Installation instruction
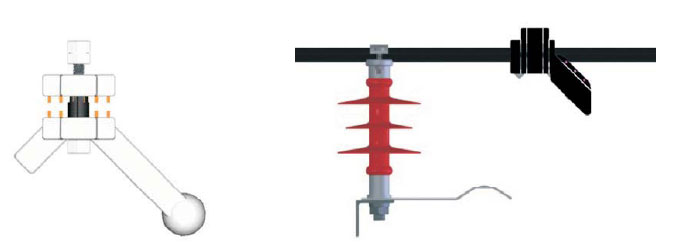
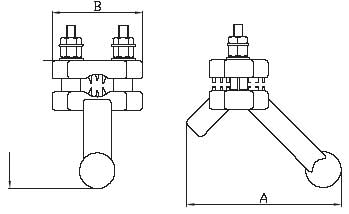
a ) Choose the corresponding clamp according to the type of the conductor and nominal cross
section.Install the lightning proof clamp on the load side of insulator, and determine the
distance (D) between the clamp and the center of insulator according to table2.
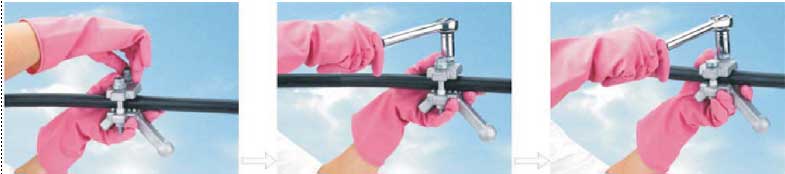
b ) Loosen the pressure cover, and put the conductor into the groove, note that the shorter
arc arm should be toward to the insulator, and the longer arcing arm should be against the
insulator. Adjust the distance D according to table 2.Then alternating symmetrically tighten
the torque nut by torque wrench until the head of torque nut twisted off.
c ) Loosen the nut of insulator pin, and then insert the fork entry of grounding plate into the
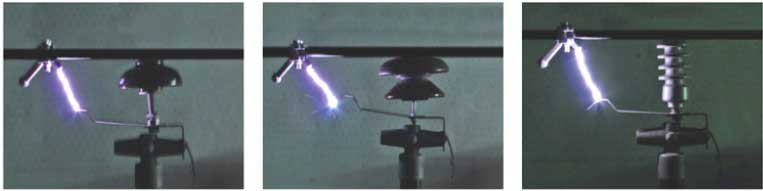
gap of insulator base and tower cross arm.The striking arc arm will be under the conductor
and arc electrode.
d ) Adjust the plate extended distance to make the distance L of striking arc arm and arc
electrode consistent with the table2.the distance between arc arm and arcing arm end ball
should be bigger than L,in order to quickly move the sustaining power current to arcing arm
by electric field when flashover occurs.
e) Equip the clamp with insulator cover, and buckle the fasteners and then the installation is
complete.
f ) The conductor and insulator,fixed on the pole' s cross arm, may not be connected to
the ground, due to the protection by its relatively low volt-time characteristic. This will economize the cost.
g ) Lines shall be inspected before and after rainy season and checked whether the product
is installed in a normal state, or damaged. If necessary, adjust or replace the equipments,
h ) If an automatic reclosing protection equipment is installed at line starting side, adjust the
parameters to effectively reduce line interruption frequency.